Evil Crow RF V2 SDR 소프트웨어 정의 라디오
(Evil Crow RF V2 SDR)
개요
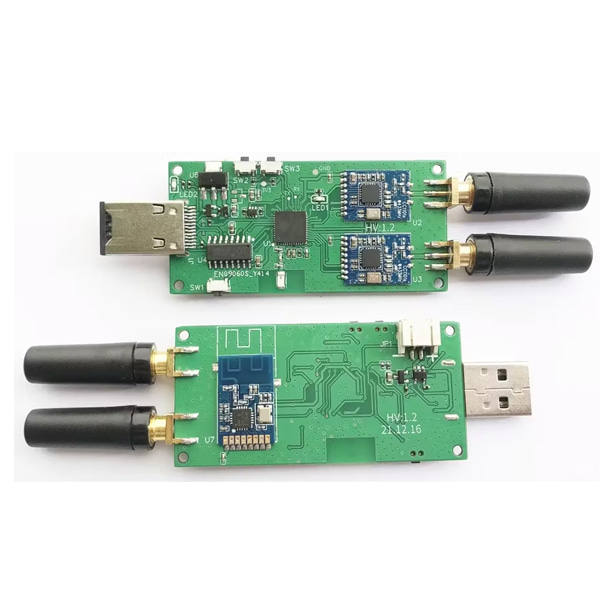
- 본 제품은 Evil Crow RF V2 SDR 소프트웨어 정의 라디오입니다.
- 라디오 주파수 해킹 연구에 사용할 수 있는 제품으로 아래의 주파수 밴드에서 동작이 가능합니다.
- 300Mhz-348Mhz
- 387Mhz-464Mhz
- 779Mhz-928Mhz
- 2.4GHz
- 두 개의 CC1101 모듈을 장착하고 있으며, 이 모듈은 동시에 서로 다른 주파수로 송수신하게 설정할 수 있습니다.
- 기본 펌웨어가 탑재되어 출고됩니다.
특징
-
Evil Crow RF V2 is a radiofrequency hacking device for pentesting and Red Team operations, this device operates in the following radiofrequency bands:
- 300Mhz-348Mhz
- 387Mhz-464Mhz
- 779Mhz-928Mhz
- 2.4GHz
Evil Crow RF V2 has two CC1101 radiofrequency modules, these modules can be configured to transmit or receive on different frequencies at the same time. Additionally, Evil Crow RF V2 has a NRF24L01 module for other attacks including:
- Signal receiver
- Signal transmitter
- Replay attack
- URH parse
- Mousejacking
- All devices have been flashed with basic firmware Evil Crow RF V2 before shipping.
- Please do not ask for new functions in this code. You can develop code for Evil Crow RF V2 and send PR with your new code.
문서
-
Firmware
The basic firmware allows to receive and transmit signals. You can configure the two radio modules through a web panel via WiFi.
Installation
- Install esptool: sudo apt install esptool
- Install pyserial: sudo pip install pyserial
- Download and Install the Arduino IDE: https://www.arduino.cc/en/main/software
- Download Evil Crow RF V2 repository: git clone https://github.com/joelsernamoreno/EvilCrowRF-V2.git
- Download the ESPAsyncWebServer library in the Arduino library directory: git clone https://github.com/me-no-dev/ESPAsyncWebServer.git
- Download the AsyncTCP library in the Arduino library directory: git clone https://github.com/me-no-dev/AsyncTCP.git
- Edit AsyncTCP/src/AsyncTCP.h and change the following:
- #define CONFIG_ASYNC_TCP_USE_WDT 1 to #define CONFIG_ASYNC_TCP_USE_WDT 0
- Open Arduino IDE
- Go to File – Preferences. Locate the field “Additional Board Manager URLs:” Add “https://dl.espressif.com/dl/package_esp32_index.json” without quotes. Click “Ok”
- Select Tools – Board – Boards Manager. Search for “esp32”. Install “esp32 by Espressif system version 1.0.6”. Click “Close”.
- Open the EvilCrowRF-V2/firmware/v1.0/EvilCrow-RFv2/EvilCrow-RFv2.ino sketch
- Select Tools:
- Board – “ESP32 Dev Module”.
- Flash Size – “4MB (32Mb)”.
- CPU Frequency – “80MHz (WiFi/BT)”.
- Flash Frequency – “40MHz”
- Flash Mode – “DIO”
- Upload the code to the Evil Crow RF V2 device
- Copy the EvilCrowRF-V2/firmware/v1.0/SD/HTML folder to a MicroSD card.
- Copy the EvilCrowRF-V2/firmware/v1.0/SD/URH folder to a MicroSD card.

First steps with Evil Crow RF V2
- Insert the MicroSD card into the Evil Crow RF V2 and connect the device to an external battery or laptop.
- Visualize the wifi networks around you and connect to the Evil Crow RF V2 (default SSID: Evil Crow RF v2).
- Enter the password for the wifi network (default password: 123456789).
- Open a browser and access the web panel (default IP: 192.168.4.1).
- Go!

RX Config Example
- Module: (1 for first CC1101 module, 2 for second CC1101 module)
- Modulation: (example ASK/OOK)
- Frequency: (example 433.92)
- RxBW bandwidth: (example 58)
- Deviation: (example 0)
- Data rate: (example 5)

RX Log Example

RAW TX Config Example
- Module: (1 for first CC1101 module, 2 for second CC1101 module)
- Modulation: (example ASK/OOK)
- Transmissions: (number transmissions)
- Frequency: (example 433.92)
- RAW Data: (raw data or raw data corrected displayed in RX Log)
- Deviation: (example 0)

Binary TX Config Example
- Module: (1 for first CC1101 module, 2 for second CC1101 module)
- Modulation: (example ASK/OOK)
- Transmissions: (number transmissions)
- Frequency: (example 433.92)
- Binary Data: (binary data displayed in RX Log)
- Sample Pulse: (samples/symbol displayed in RX Log)
- Deviation: (example 0)

Pushbuttons Configuration
- Button: (1 for first pushbutton, 2 for second pushbutton)
- Modulation: (example ASK/OOK)
- Transmissions: (number transmissions)
- Frequency: (example 433.92)
- RAW Data: (raw data or raw data corrected displayed in RX Log)
- Deviation: (example 0)

URH Parse example
Demo: https://youtube.com/watch?v=TAgtaAnLL6U
Other Sketches
- Mousejacking: EvilCrowRF-V2/firmware/other/standalone-mousejacking
- …
repo: https://github.com/joelsernamoreno/EvilCrowRF-V2


연관제품
- 연관제품 1